The difference between a room that feels awkward and one that flows perfectly often comes down to layout. Whether you're furnishing a new space or redesigning an existing room, the right layout planner tool can transform your vision into reality while avoiding costly mistakes and frustrating furniture shuffles.
In this comprehensive guide, we'll explore everything from layout psychology and traffic flow principles to the best digital and AI-powered room layout planner tools available in 2025. You'll learn how to create functional, beautiful spaces that work for your lifestyle.
🏗️ Room Layout Fundamentals
Before diving into tools, understanding the core principles of effective room layout is essential. These foundational concepts guide every successful space plan, from studio apartments to sprawling living rooms.
Traffic Flow Psychology: How People Move Through Spaces
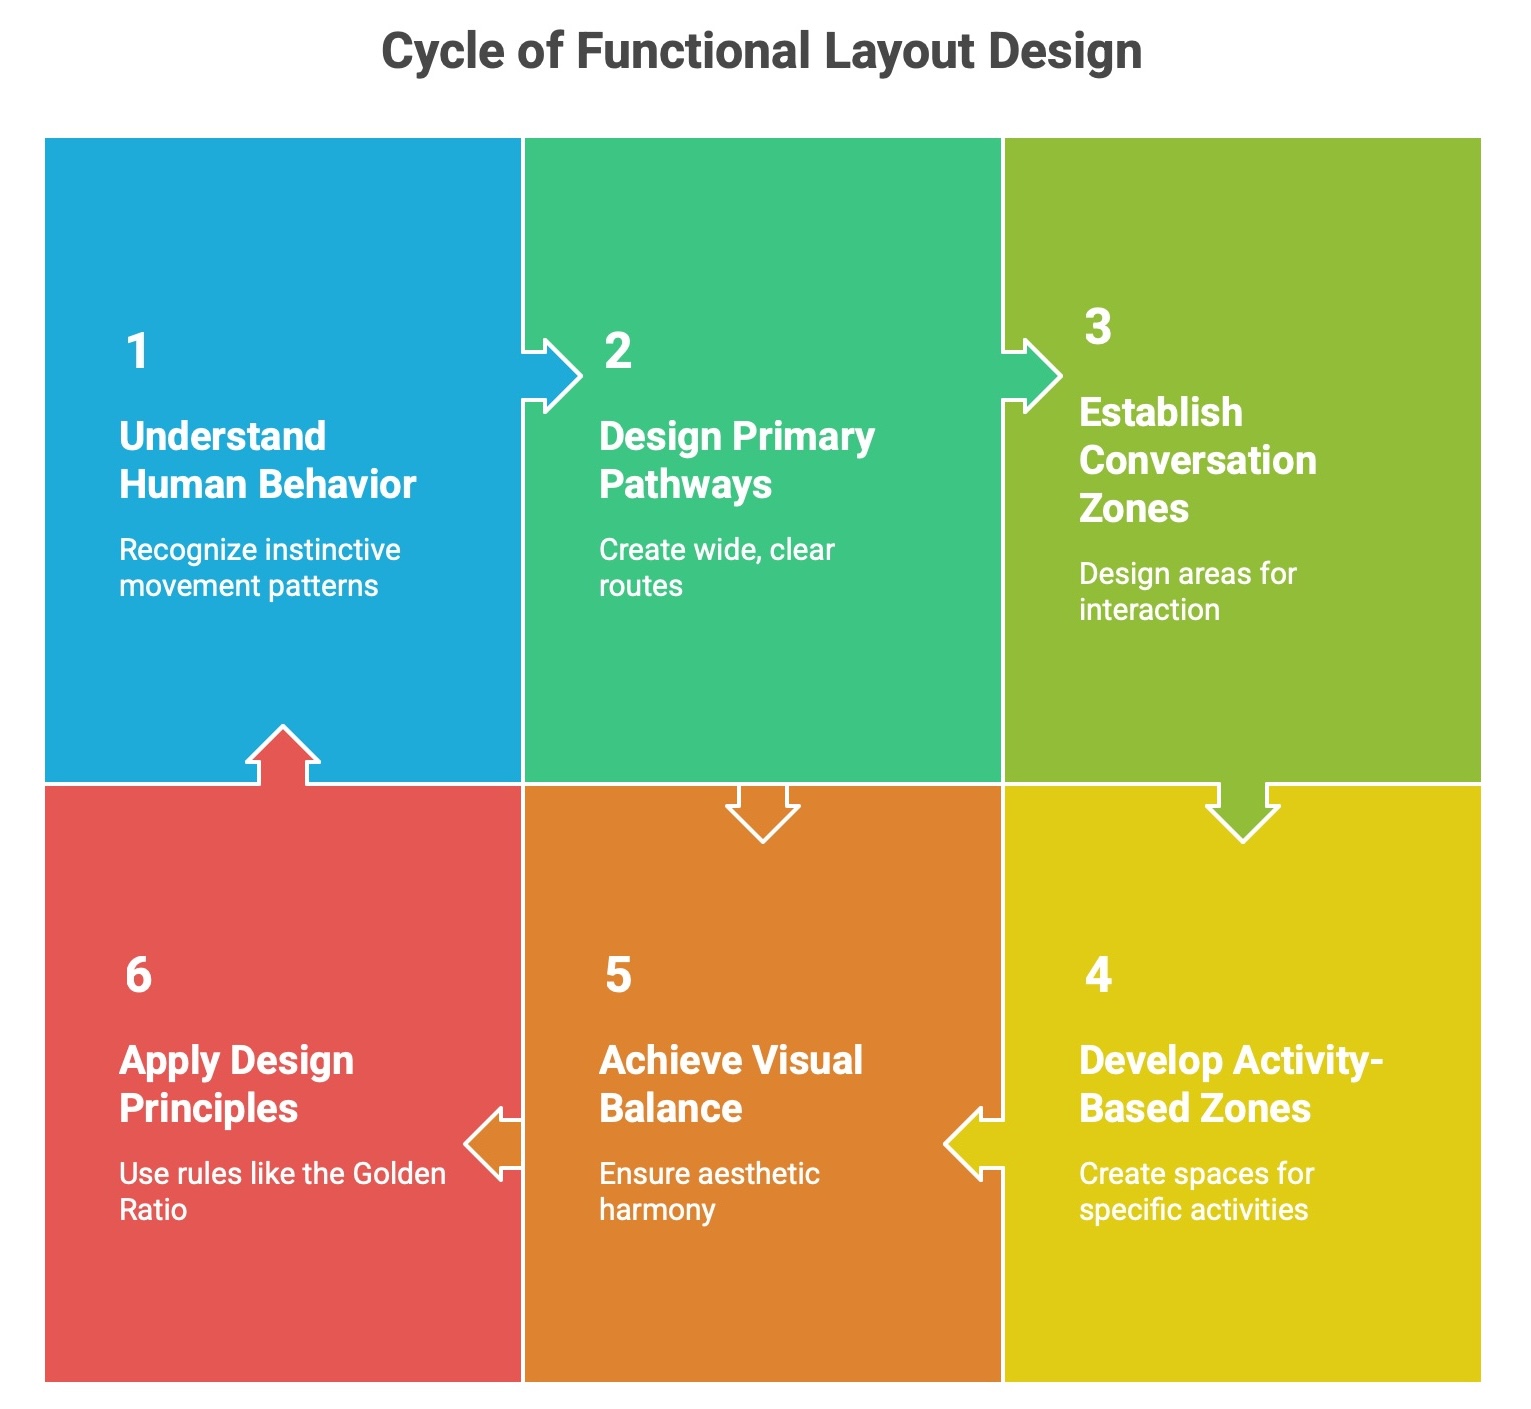
Human movement patterns are remarkably predictable. We naturally gravitate toward the widest path, avoid tight squeezes, and seek clear sight lines. Understanding these instinctive behaviors is the foundation of functional layout design.
Primary Pathways
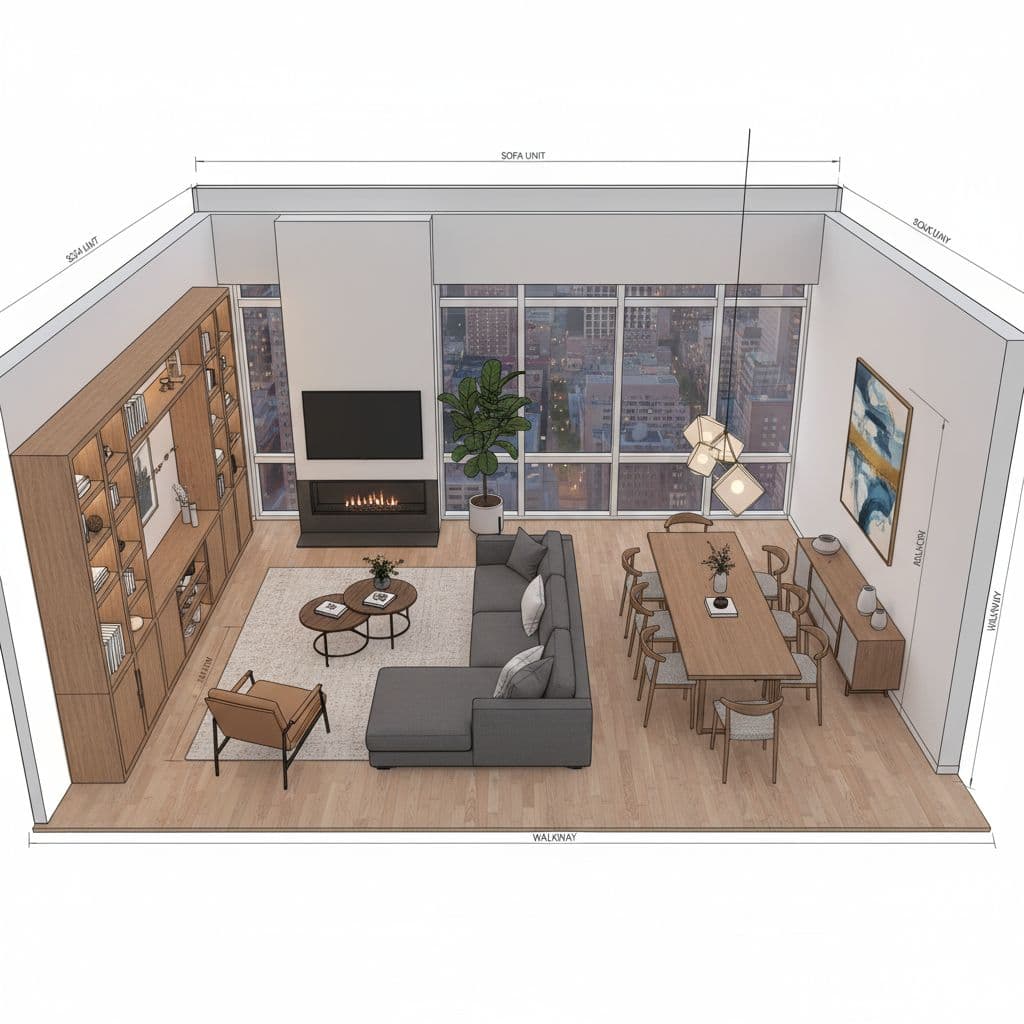
Main circulation routes should be 36-48 inches wide—enough for two people to pass comfortably. These paths connect room entrances to key destinations like seating areas or workspaces.
- • Minimum width: 36 inches
- • Ideal width: 42-48 inches
- • Keep furniture edges clear
- • Align with natural entry/exit points
Conversation Zones
Seating arrangements should place people 4-8 feet apart for comfortable conversation. Too close feels intrusive; too far requires raised voices and feels disconnected.
- • Intimate seating: 4-5 feet apart
- • Social seating: 6-8 feet apart
- • Create 90° and facing angles
- • Avoid "bowling alley" layouts
Activity-Based Zones
Every room serves multiple functions. Define clear zones for each activity—reading, entertaining, working—and ensure each has adequate space and proper orientation.
- • Reading nook: 3x4 feet minimum
- • Dining area: 3 feet per chair
- • Work zone: 6x4 feet desk space
- • Entertainment center: viewing distance = 1.5-2.5x screen width
Visual Balance
Eye naturally seeks equilibrium. Distribute visual weight evenly across the room by balancing large furniture pieces with open space and lighter elements.
- • Anchor each wall section
- • Balance heavy with light
- • Use symmetry or asymmetrical balance
- • Consider sight lines from entry
Layout Design Principles
The Golden Ratio in Room Design
The 1:1.618 ratio appears throughout nature and creates inherently pleasing proportions. Apply it to furniture placement: if your sofa is 84 inches, complementary pieces should measure approximately 52 inches (84 ÷ 1.618) for visual harmony.
Balance and Symmetry
Symmetrical layouts (mirror-image arrangements) create formal, stable feelings ideal for traditional spaces. Asymmetrical balance (different elements with equal visual weight) offers dynamic, contemporary energy. Most successful rooms blend both approaches.
Scale and Proportion Rules
Furniture should relate proportionally to room size and ceiling height. In rooms with 8-foot ceilings, keep furniture under 36 inches tall to maintain airiness. High ceilings (10+ feet) can accommodate taller pieces and vertical arrangements without feeling cramped.
The 2/3 Rule for Furniture Sizing
A foolproof principle: furniture arrangements should occupy roughly 2/3 of a room's floor space, leaving 1/3 open for circulation. This creates fullness without clutter.
Small Rooms (< 200 sq ft)
65% furniture, 35% circulation
Medium Rooms (200-350 sq ft)
60% furniture, 40% circulation
Large Rooms (> 350 sq ft)
55% furniture, 45% circulation
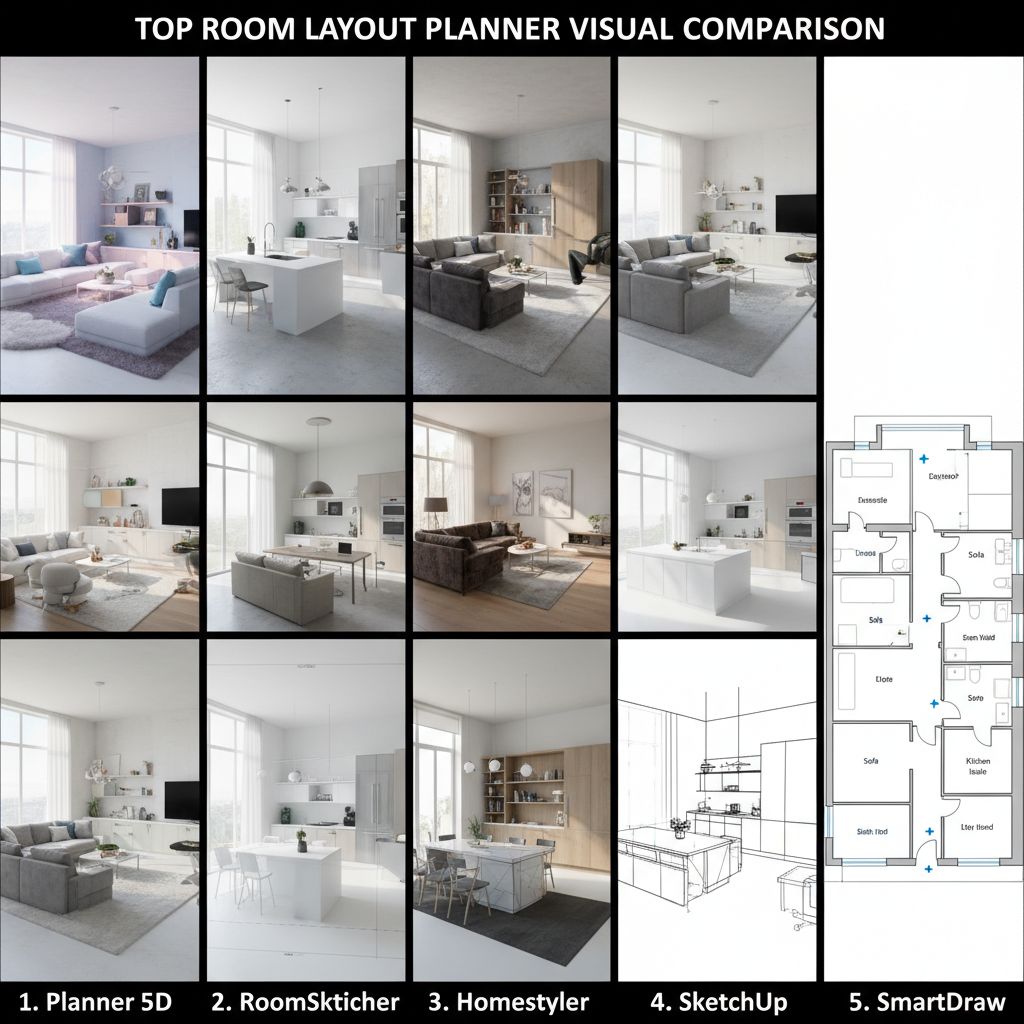
🔧 Types of Room Layout Planners

Layout planning tools range from traditional paper methods to cutting-edge AI systems. Each approach offers unique advantages depending on your technical comfort, project scope, and desired level of detail.
Digital Layout Tools
1. Online Planners (Free vs Paid)
Free Options:
- • Browser-based, no installation
- • Basic drag-and-drop furniture
- • Limited furniture libraries
- • 2D views primarily
- • Export restrictions (watermarks)
Premium Options:
- • Extensive furniture catalogs
- • 3D visualization and walkthroughs
- • Accurate measurements and spacing
- • Professional export formats
- • Cost: $10-30/month typically
2. Mobile Apps
Advantages:
- • Plan on-site while shopping
- • AR visualization (see furniture in space)
- • Photo import and tracing
- • Touch-based intuitive controls
Limitations:
- • Smaller screen = less precision
- • Limited compared to desktop versions
- • Battery drain during AR sessions
3. Desktop Software
Professional Features:
- • CAD-level precision
- • Detailed lighting simulation
- • Material and texture libraries
- • Blueprint-ready exports
- • Cost: $50-500 one-time or subscription
Best For:
- • Professional designers and architects
- • Complex renovation projects
- • Clients requiring detailed plans
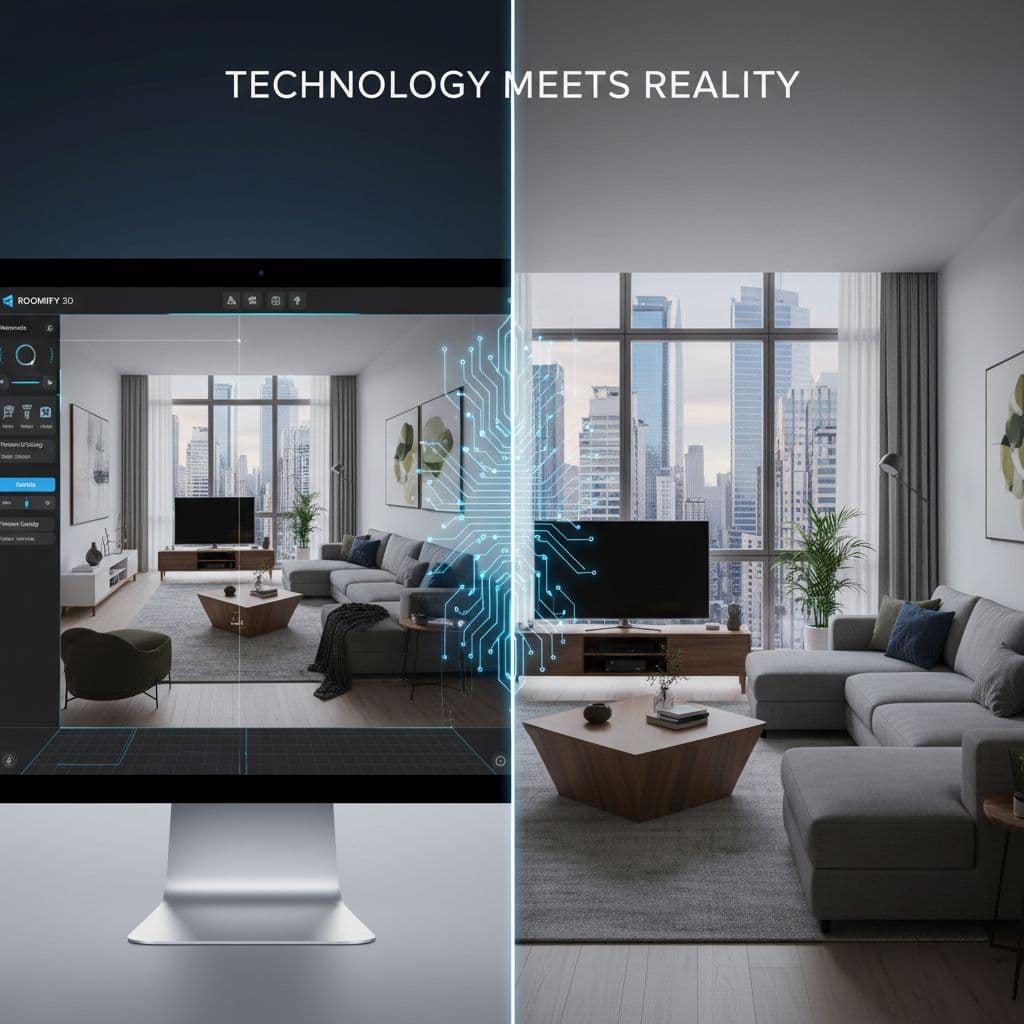
4. AI-Powered Layout Generators
Revolutionary Capabilities:
- • Instant layout from room photos
- • Automatically optimized furniture placement
- • Style-specific arrangements
- • Traffic flow analysis
- • Multiple layout options in seconds
Leading Example:
- • Upload room photo → AI analyzes space
- • Select style → Get optimized layout
- • Visualize before purchasing furniture
- • Cost-effective: $3.99-16.99/month
Traditional Layout Methods
Graph Paper Planning
Classic method: 1 square = 1 foot. Draw room outline, sketch furniture to scale. Simple, no tech required, perfect for rough drafts.
Furniture Templates
Cut-out paper pieces representing furniture at scale. Move around floor plan until optimal arrangement found. Tactile and intuitive.
Measuring & Marking
Use painter's tape on actual floor to mark furniture positions. Test traffic flow before purchasing. Most accurate physical method.
🏆 Best Room Layout Planner Tools by Need
Choosing the right layout planner depends on your specific needs, budget, and technical expertise. Here's our expert evaluation of the best tools across different user categories.
🏆 #1 Recommended: Decoratly
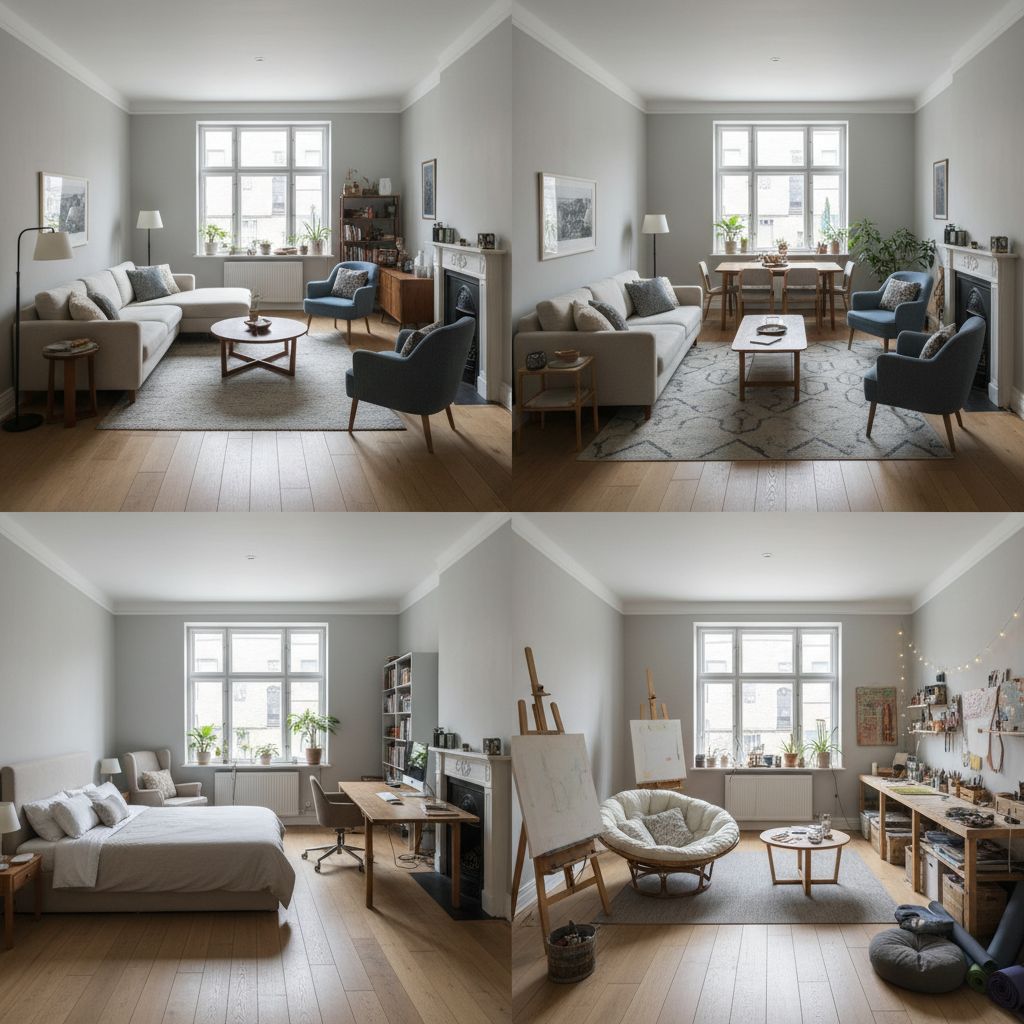
AI-powered room layout and design tool that instantly generates optimized furniture arrangements from a single photo.
Speed
30-second layouts
Accuracy
AI spatial analysis
Modes
Makeover & Enhance
Output
4K resolution
Key Features:
- • Upload room photo → AI generates optimized layouts instantly
- • 50+ style presets or custom style builder for personalized designs
- • Makeover mode: Complete room transformation including architectural elements
- • Enhance mode: Realistic refinements with furniture additions/removals
- • Add/remove objects, change colors, adjust lighting, place furniture from photos
- • Free trial: 2 photos, 2 renders, 1 edit | Pro: Unlimited everything + 4K export
For Beginners
Planner5D
Intuitive drag-and-drop interface with extensive furniture library
Best for: First-time planners | Cost: Free basic, $9.99/month premium
Roomstyler 3D
Browser-based tool with real furniture from major brands
Best for: Visual learners | Cost: Free with ads
For Renters (No-Measurement Tools)
IKEA Place (App)
AR app that places true-to-scale IKEA furniture in your room via camera
Best for: IKEA shoppers | Cost: Free
Modsy
Upload photos, get 3D rendered layouts with shoppable items
Best for: Quick visualization | Cost: $89 per room design
For Professionals
AutoCAD Architecture
Industry-standard CAD software with precision drafting tools
Best for: Architects, complex projects | Cost: $235/month
SketchUp Pro
3D modeling with extensive plugin ecosystem and rendering capabilities
Best for: Interior designers | Cost: $299/year
For Specific Room Types
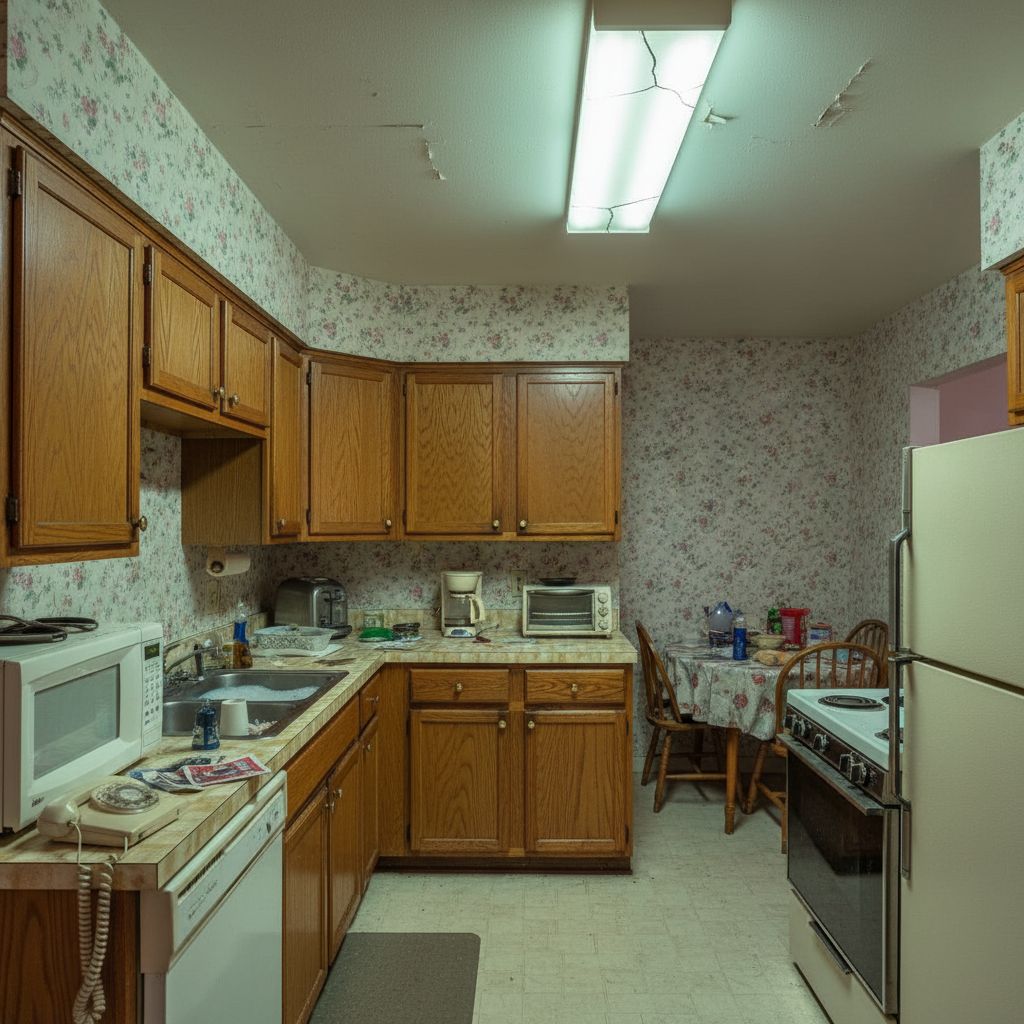
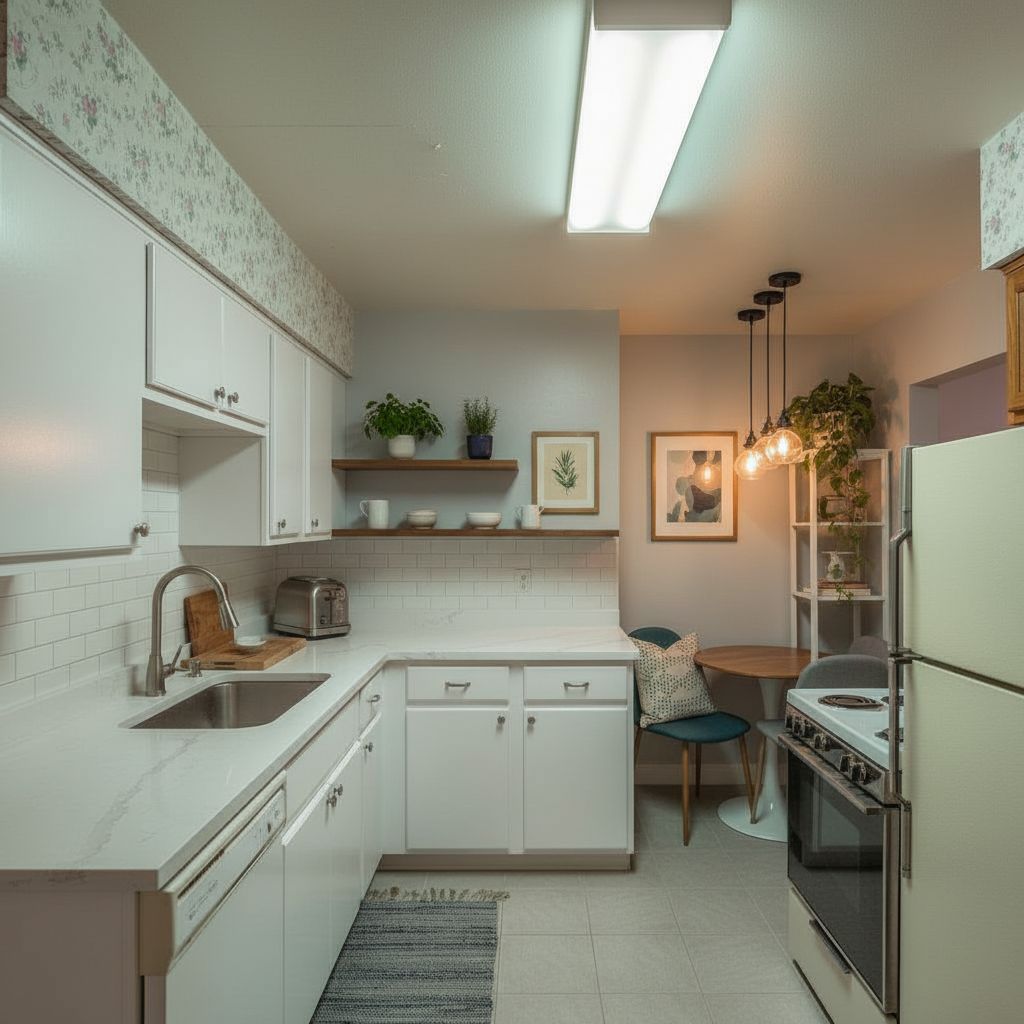
Kitchens: IKEA Kitchen Planner
Specialized tool for cabinet layouts with plumbing/appliance constraints. Free and surprisingly capable.
Bathrooms: Lowe's Virtual Designer
Focus on fixtures, storage, and ADA compliance. Good for remodeling planning.
Home Offices: Room Planner by Chief Architect
Ergonomic workspace layouts with desk positioning and cable management.
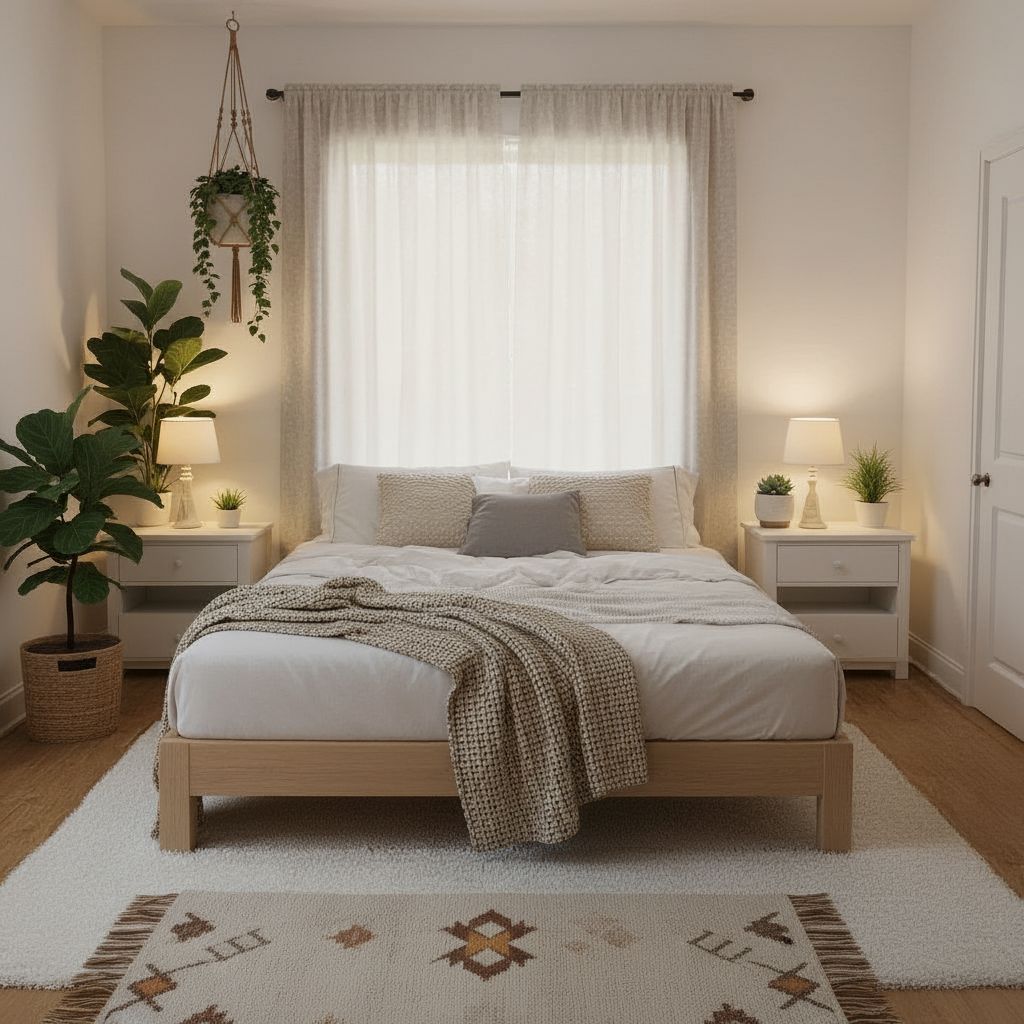
Bedrooms: Havenly
Focuses on sleep optimization and personal sanctuary creation.
🏠 Layout Planning by Room Function
Each room type demands specific layout considerations based on its primary function, traffic patterns, and user needs. Master these principles for every space in your home.
Multi-Purpose Room Layouts
Modern living often requires rooms to serve multiple functions—living room + home office, guest room + exercise space. Success requires zoning strategies and flexible furniture.
Visual Separation Techniques
- • Area rugs define separate zones
- • Bookcases as room dividers
- • Different lighting for each function
- • Consistent color palette unifies space
Furniture Selection
- • Sleeper sofas for guest rooms
- • Fold-down desks for work zones
- • Storage ottomans (dual purpose)
- • Mobile furniture for reconfiguration
Small Space Optimization
Compact rooms require strategic layouts that maximize every square foot while maintaining comfort and functionality. Vertical space and multi-functional pieces are key.
Space-Saving Strategies
- • Wall-mounted furniture reduces footprint
- • Mirrors expand visual space
- • Light colors make rooms feel larger
- • Keep floor visible (fewer obstacles)
Vertical Utilization
- • Floor-to-ceiling shelving
- • Loft beds create underneath space
- • Wall-mounted TV and components
- • Tall, narrow storage units
Open Concept Planning
Open floor plans offer flexibility but require careful zoning to prevent one large, undefined space. Create distinct areas while maintaining flow.
Defining Zones
- • Furniture backs create boundaries
- • Consistent sightlines through space
- • Lighting defines different areas
- • Ceiling treatments (beams, colors)
Traffic Flow
- • Clear paths between zones
- • Furniture floats away from walls
- • Strategic rug placement guides movement
- • Maintain 36-inch minimum pathways
Single-Function Room Design
Dedicated-purpose rooms allow specialized optimization. Focus entirely on the primary activity without compromise.
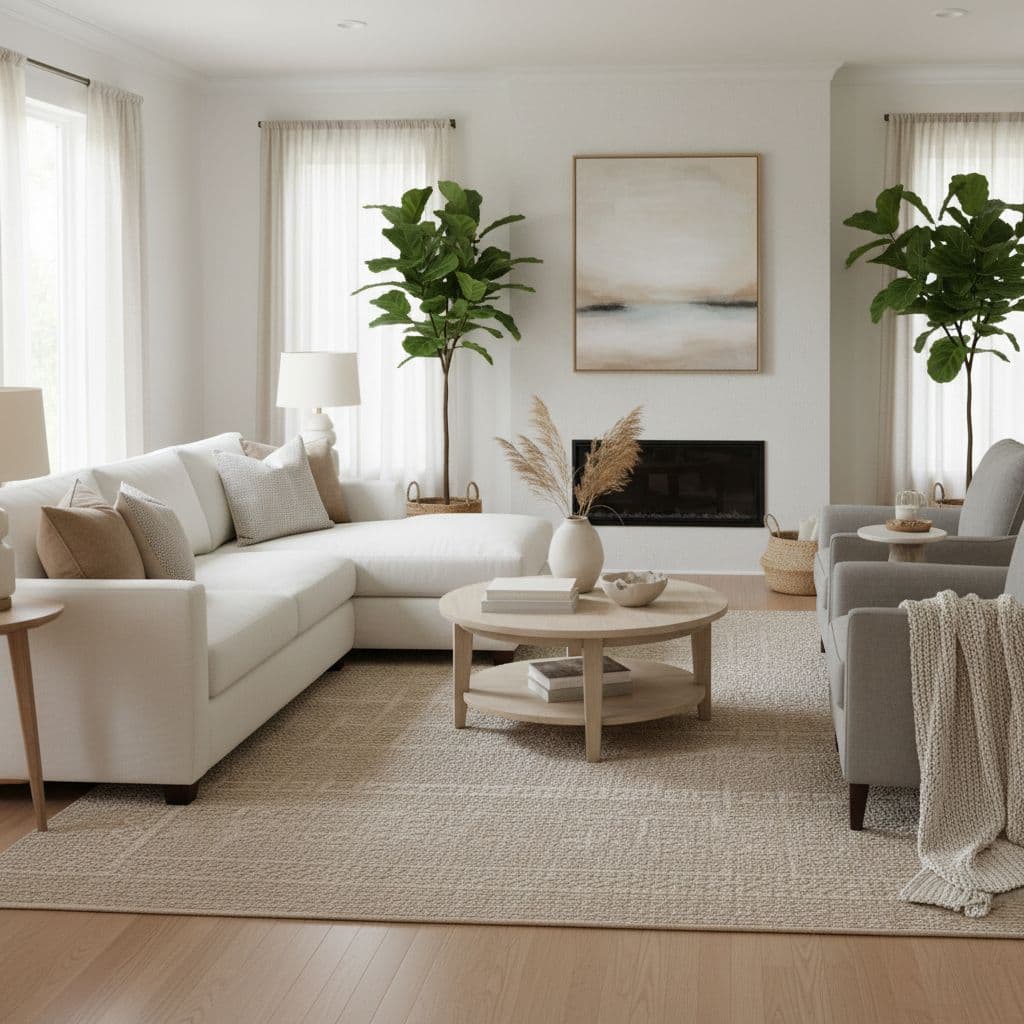
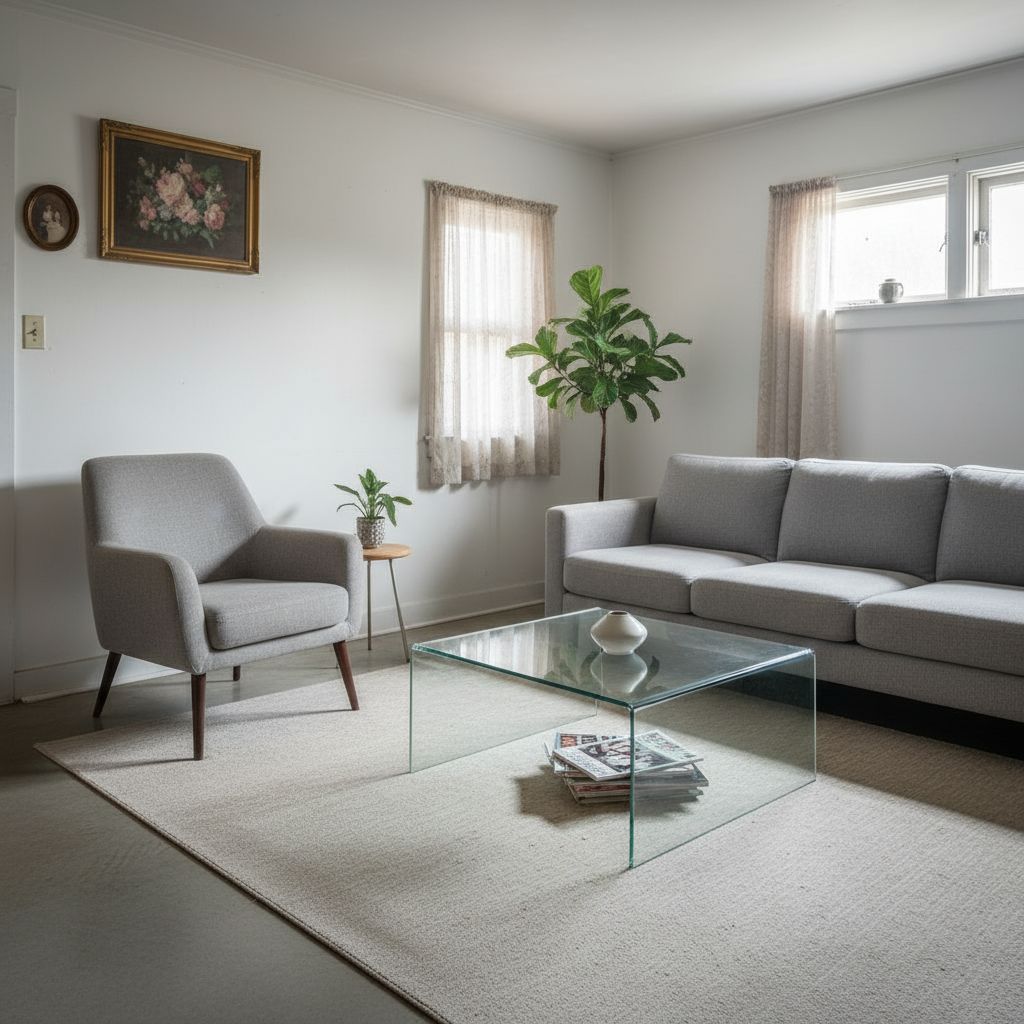
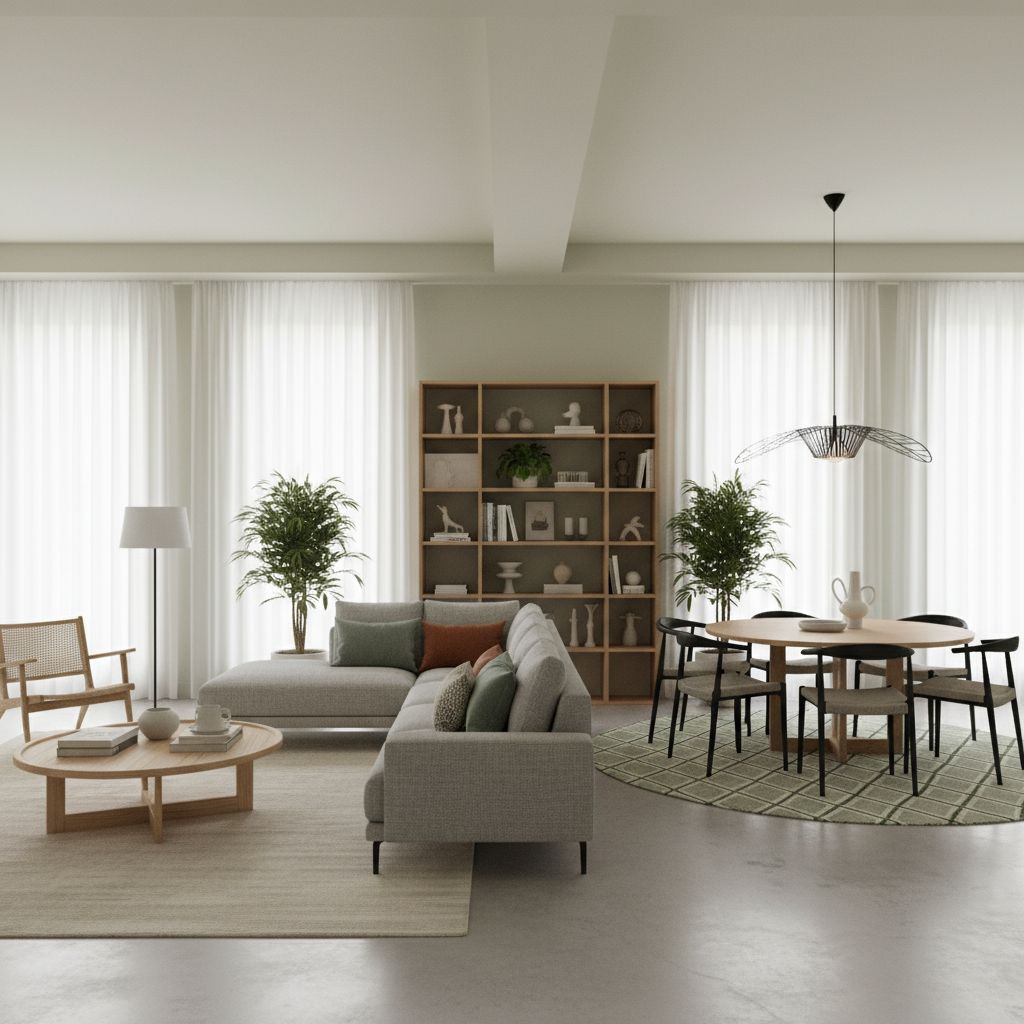
Living Rooms
- • Conversation-focused seating arrangements
- • TV viewing angles: 30° max from center
- • Coffee table within arm's reach (14-18")
- • Anchor with large area rug
Dining Rooms
- • 3 feet per person at table
- • 42-48 inches between table and wall
- • Chandelier 30-36 inches above table
- • Buffet/sideboard for serving space
✅ Layout Testing & Optimization
Even the best-planned layouts benefit from testing before final implementation. These validation methods help identify issues early and refine your design for maximum functionality.
Virtual Testing Methods
3D Visualization Walkthroughs
Digital tools let you "walk through" your planned layout before purchasing furniture. Look for:
- • Pinch points in traffic flow
- • Awkward furniture angles
- • Blocked natural light
- • Visual balance from entry
- • Adequate clearances
AR (Augmented Reality) Testing
Use smartphone apps to project furniture into your actual space via camera. Benefits include:
- • True-to-scale visualization
- • Real lighting conditions
- • Immediate spatial feedback
- • Test multiple arrangements quickly
- • Share views with family/roommates
Physical Space Testing
The Tape Method
Use painter's tape to outline furniture positions on your floor. This low-tech approach reveals issues digital tools might miss:
- • Walk your daily patterns through taped layout
- • Sit on floor where furniture will be (sight lines)
- • Open doors and drawers to check clearances
- • Live with taped layout for 2-3 days
- • Cost: $5 for painter's tape vs. $500 furniture mistake
Cardboard Mock-ups
Cut cardboard to furniture dimensions for 3D testing. Especially useful for:
- • Testing sofa/bed heights (stack to correct elevation)
- • Evaluating large piece proportions
- • Understanding visual weight
- • Getting family consensus before purchase
Family Input & Iteration
Gathering Feedback
Everyone who uses the space should weigh in. Create a structured feedback process:
- 1. Share layout via 3D render or photo with tape outlines
- 2. Ask specific questions (not "what do you think?")
- 3. Focus on functionality over aesthetics first
- 4. Test competing layouts side-by-side
- 5. Document concerns and preferences
Seasonal Adjustments
Rooms function differently across seasons. Plan for:
- • Summer: Maximize airflow and natural cooling
- • Winter: Seating near heat sources, cozy arrangements
- • Holidays: Flexible layouts for gatherings
- • Work-from-home: Dedicated vs. convertible spaces
⚠️ Common Layout Problems & Solutions
Every room presents unique challenges. These proven solutions address the most frequent layout obstacles, turning design liabilities into opportunities for creative problem-solving.
Narrow Rooms (Bowling Alley Effect)
❌ Common Mistakes
- • Lining furniture against long walls
- • Single light source at one end
- • All seating facing same direction
- • Long, empty corridors
✅ Effective Solutions
- • Create zones (divide into 2-3 areas)
- • Float furniture perpendicular to long walls
- • Use area rugs to define squares
- • Multiple lighting zones break up length
- • Paint short walls darker (pulls them forward)
Awkward Corners
❌ Wasted Space
- • Empty corners collect dust
- • Furniture pushed into corners (inaccessible)
- • Dead zones that disrupt flow
✅ Smart Corner Uses
- • Corner reading nook (chair + lamp + bookshelf)
- • Diagonal furniture placement
- • Tall corner shelving (vertical storage)
- • Plants in decorative stands
- • Home office setup (L-shaped desk)
Multiple Entrances/Doorways
❌ Traffic Chaos
- • Furniture blocking natural paths
- • No clear primary circulation route
- • Conversation areas interrupted by foot traffic
✅ Flow Management
- • Map all pathways first, then place furniture
- • Create "hallway" through room (48" wide)
- • Angle seating away from main traffic
- • Use furniture backs as pathway borders
- • Keep activity zones off main circulation
Low Ceiling Challenges
❌ Cave Effect
- • Tall furniture overwhelming space
- • Dark colors absorbing light
- • Heavy horizontal elements
✅ Height Illusions
- • Keep furniture under 36 inches tall
- • Vertical stripes or tall narrow elements
- • Paint ceiling lighter than walls
- • Uplighting reflects off ceiling
- • Floor-to-ceiling curtains (draw eye up)
When to Seek Professional Help
While DIY layout planning works for most spaces, some situations benefit from expert intervention:
- Structural changes required (moving walls, HVAC, electrical)
- ADA compliance or accessibility needs
- Commercial or rental property regulations
- High-value investments requiring precise execution
📊 Layout Tools by Skill Level
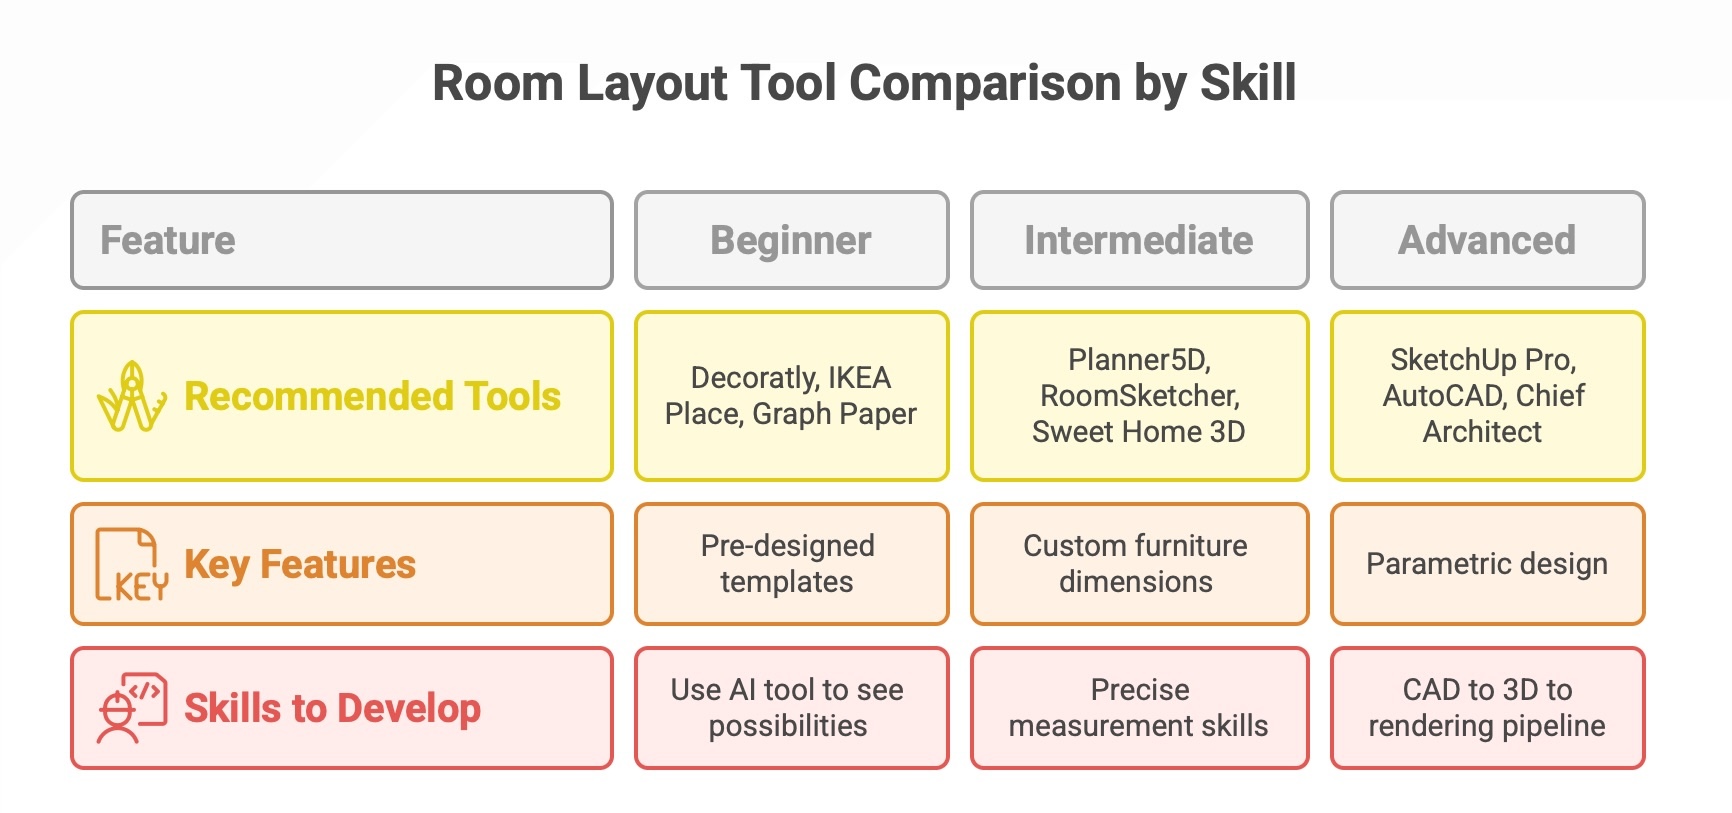
Your ideal layout planner depends on your technical comfort level. Here's how to choose the right tool as you develop your space planning skills.
Beginner Level (Never Planned a Room Before)
Start Here
- Decoratly - AI does the heavy lifting
- IKEA Place - Simple AR visualization
- Graph Paper - Learn fundamentals
Key Features to Seek
- • Pre-designed templates
- • Drag-and-drop simplicity
- • Automatic measurements
- • Visual tutorials
- • Error warnings
Learning Path
- • Use AI tool to see possibilities
- • Understand why layouts work
- • Experiment with variations
- • Graduate to manual tools
Intermediate Level (Comfortable with Basic Design)
Recommended Tools
- Planner5D - Balance of power/ease
- RoomSketcher - Good 3D capabilities
- Sweet Home 3D - Free and capable
Advanced Features
- • Custom furniture dimensions
- • Multiple floor levels
- • Lighting simulation
- • Material textures
- • Export to various formats
Skills to Develop
- • Precise measurement skills
- • Understanding scale/proportion
- • Color and material selection
- • Multi-angle visualization
Advanced Level (Professional or Serious Enthusiast)
Professional Tools
- SketchUp Pro - Industry standard 3D
- AutoCAD - Precision drafting
- Chief Architect - Complete design suite
Expert Capabilities
- • Parametric design
- • Photorealistic rendering
- • Construction documentation
- • Code compliance checking
- • Client presentation packages
Workflow Integration
- • CAD to 3D to rendering pipeline
- • Collaboration with contractors
- • Version control systems
- • Cost estimation tools
The Hybrid Approach: Combining Tools for Best Results
Smart designers mix tools based on project phase. This maximizes efficiency without sacrificing quality:
Phase 1: Exploration
AI tools (Decoratly) or simple planners
Generate multiple concepts quickly, explore style options
Phase 2: Refinement
Mid-level 3D tools
Fine-tune preferred layout, test variations, verify measurements
Phase 3: Validation
Physical testing (tape method)
Walk through layout in actual space, confirm before purchasing
❓ Frequently Asked Questions
Do I need to measure my room before using a layout planner?
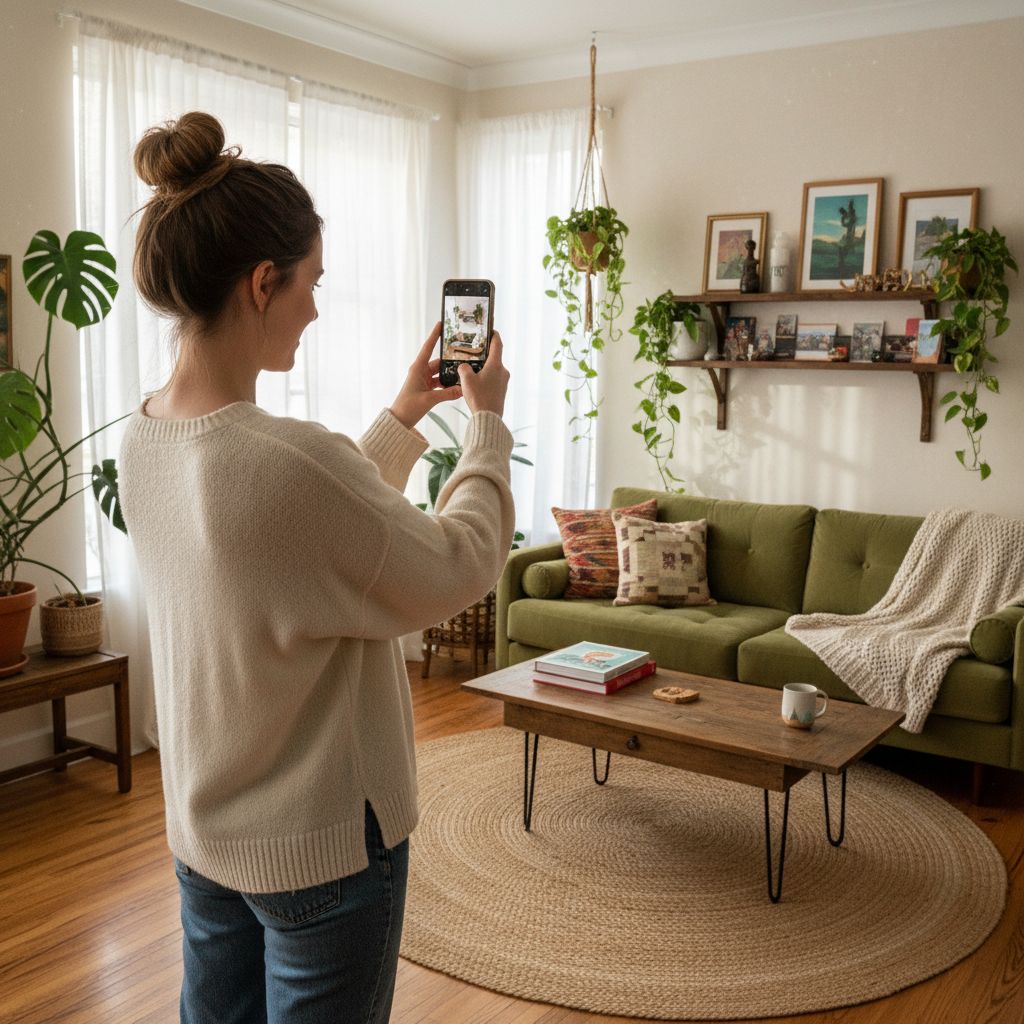
For traditional planners: yes, accurate measurements are essential. For AI-powered tools like Decoratly: no—simply upload a photo and the AI analyzes your space automatically. However, knowing your room's dimensions helps you shop for appropriately sized furniture regardless of your planning method.
What's the minimum walkway width between furniture?
Primary pathways should be 36-48 inches wide for comfortable passage. Secondary paths (like between sofa and coffee table) can be as narrow as 18 inches, though 24-30 inches is more comfortable. Doorways and main circulation routes always require the full 36-48 inch clearance.
Can I plan a room layout without knowing what furniture I'll buy?
Absolutely. Start with standard furniture dimensions (sofas are typically 84-96" long, dining chairs need 24" width, etc.) to create your layout. Once you identify pieces that fit your plan, you can refine the layout with exact dimensions. AI tools often suggest furniture arrangements for various styles, giving you shopping guidance.
How do I know if furniture will look proportional to my room?
Use the 2/3 rule: furniture should occupy about two-thirds of your floor space. For individual pieces, they should be no more than two-thirds the length of the wall they're against. Visual weight matters too—a heavy leather sofa needs more breathing room than a lightweight modern piece of the same dimensions.
What's better: symmetrical or asymmetrical layouts?
Neither is inherently better—it depends on your style and space. Symmetrical layouts (mirror-image arrangements) create formal, traditional feelings and work well in rectangular rooms. Asymmetrical layouts feel more dynamic and contemporary, and handle irregular spaces better. Most successful rooms incorporate both principles: symmetry in the main furniture grouping with asymmetrical accents.
Should I arrange furniture around the TV or the fireplace?
Choose your primary focal point based on how you actually use the room. If you watch TV daily but use the fireplace occasionally, orient seating toward the TV. For rooms where you entertain frequently, the fireplace might be primary. Ideally, position furniture to accommodate both (TV above or beside fireplace, or seating that angles to view both).
Ready to Create Your Perfect Layout?
Stop guessing and start visualizing. Decoratly's AI-powered layout planner analyzes your space and generates professional room layouts in seconds. Try it free—no measurements, no complex software, just upload a photo and see instant possibilities.
2 free room layouts • No credit card required • AI-powered results